QR Code OTG – iOS Support & User Guide
Version 1.0
This official iOS guide shows every step to Create → Customize → Export → Scan → Organize → Reuse. All features are private, offline-first, and optimized for iPhone & iPad.
Quick Start (60s)
- Tap Create, choose a content type (URL / Text / Email / Phone / WiFi / vCard / SMS).
- Fill required fields. Validation hints appear instantly.
- Continue to Design: adjust colors, gradient, size, logo, border radius.
- Export as PNG / JPG / SVG or copy/share directly.
- Tap Scan to read any QR & trigger contextual actions.
Creating QR Codes
Each content type tailors the form to only the fields you need. Follow this detailed workflow for best scan reliability and minimal size.
Full Launch → Generate Flow
- Launch App: Open QR Code OTG. (First run only: Onboarding tutorial screens appear; finish or skip.)
- Home Screen: Two primary cards: Scan (left) and Create / Generate (right). Below: quick access (History / Help / Settings).
- Tap Create: Navigates with iOS-style slide animation to the Content Input screen.
- Content Type Card: At the top shows current type (default URL). Tap the card (chevron ▼) to open a selector dialog.
- Type Dialog: Scrollable list with icon, name, short description. Tap a type (e.g. WiFi, vCard) → dialog closes; form adapts instantly.
- Fill Required Fields: Dynamic form below: only fields relevant to the chosen type. Inline validation highlights issues (e.g. malformed URL, empty SSID).
- Inline Guidance: Error banner shows consolidated issues (if any). Tips panel at bottom switches text per type.
- Live Payload Build: Internal model updates after each keystroke once required fields are valid (no manual refresh button needed).
- Continue Button Activation: When minimum valid content exists, the grey button becomes a colored gradient and shows “Continue to Design”.
- Proceed to Design: Tap the active button → transition to Design Customization (colors, gradient stops, eyes, corners, logo, quiet zone).
- Preview & Export: After styling, export (PNG/JPG/SVG) or go Back to adjust content. Exporting writes an entry into History.
| Type | Fields | Typical Uses |
|---|---|---|
| URL | Link | Website, promo campaign |
| Text | Plain text body | Notes, instructions |
| Address, subject, body | Pre-filled contact | |
| Phone | Number | Instant call actions |
| SMS | Number, message | Opt-in flows, replies |
| WiFi | SSID, password, security | Guest access sharing |
| vCard | Name, phone, email, org, etc. | Business contact |
Step‑by‑Step
- Select Type: Pick the content category that most closely matches your intent (URL vs Text vs vCard). This activates field validation appropriate to that type.
- Enter Core Data: Fill only essential fields. Optional fields increase symbol complexity; leave them blank unless they add end‑user value.
- Watch Validation: Inline hints appear (e.g. malformed URL, unsupported WiFi security). Errors show a subtle accent border until corrected.
- Auto Preview: A lightweight internal model updates the encoded string as soon as all required fields are valid (no need to press a refresh button).
- Optimize Size: Shorten URLs (use HTTPS canonical form, remove tracking params). For Text, prefer plain ASCII when possible (fewer bytes).
- Proceed to Design: Tap Continue only after validation is clear (no red indicators). The design stage never alters the payload, only appearance.
- Export & History: When you export or leave the designer, the finalized payload is written to History. You can favorite or regenerate it later.
Field Guidelines & Best Practices
- URL: Always include protocol (https://). Remove "www." if not required. Avoid very long query strings; use a reputable shortener off‑app before encoding if needed.
- Text: Keep under ~800 characters for small print sizes. Multi‑line content is preserved; line breaks become \n.
- Email: Subject & body are URL‑encoded; avoid extremely long bodies (some mail clients truncate >2KB).
- Phone: Use international format (+81..., +1...). Remove spaces/dashes—the app normalizes but cleaner input reduces ambiguity.
- SMS: Keep message concise (older devices may split very long segments). Non‑GSM characters may increase byte size via UTF‑16.
- WiFi: Correct security type (WPA/WPA2 / WPA3 / WEP / nopass) is critical; wrong selection causes connection failure. Hidden networks are less reliable for QR auto‑join.
- vCard: Provide at least Full Name + one contact method. Organization & Title increase size—omit if not essential. The app currently exports a compact vCard 3.0 subset for compatibility.
Quality / Print Tips
- Error Correction: Higher visual complexity (gradients, logos) benefits from higher QR error correction level; the generator auto‑selects sensible defaults.
- Physical Size: For typical phone scanning at arm length, ensure the printed code is at least 2.0 cm (≈0.8 in) per 25 encoded characters.
- Contrast: Dark foreground (≈#000–#222) on light background (≈#FFF–#EEE) yields best reliability; avoid inverted color schemes unless thoroughly tested.
Troubleshooting Input
- URL rejected: Ensure scheme present and no unescaped spaces (encode with %20).
- WiFi fails to connect: Re‑verify security type or remove trailing space in SSID/password.
- vCard duplicates: If a contact already exists, iOS may merge silently—this is expected.
Design & Styling
- Solid Colors / Gradient: Up to four gradient stops; drag to reorder.
- Logo Overlay: Center icon improves branding—keep contrast high.
- Corner & Eye Shapes: Pick styles for appearance & readability.
- Quiet Zone: Maintain margin so scanners detect reliably.
- Transparency: PNG / SVG can keep alpha for layered backgrounds.
Export & Share
- Formats: PNG (transparent OK), JPG (opaque), SVG (infinite scaling).
- Sizes: 256 → 2048px selectable. Higher than needed wastes file size.
- Share Sheet: Sends image to AirDrop, Mail, Messages & more—no tracking.
- History auto-saves generated codes for future regeneration.
Scanning Codes
- Live camera feed with instant decode engine.
- Supports image import from Photos (optional permission).
- Flash & pinch-to-zoom for low light or distance.
Try It – Test QR Code
Scan this sample code with the in‑app scanner. The result should open:https://japality.com
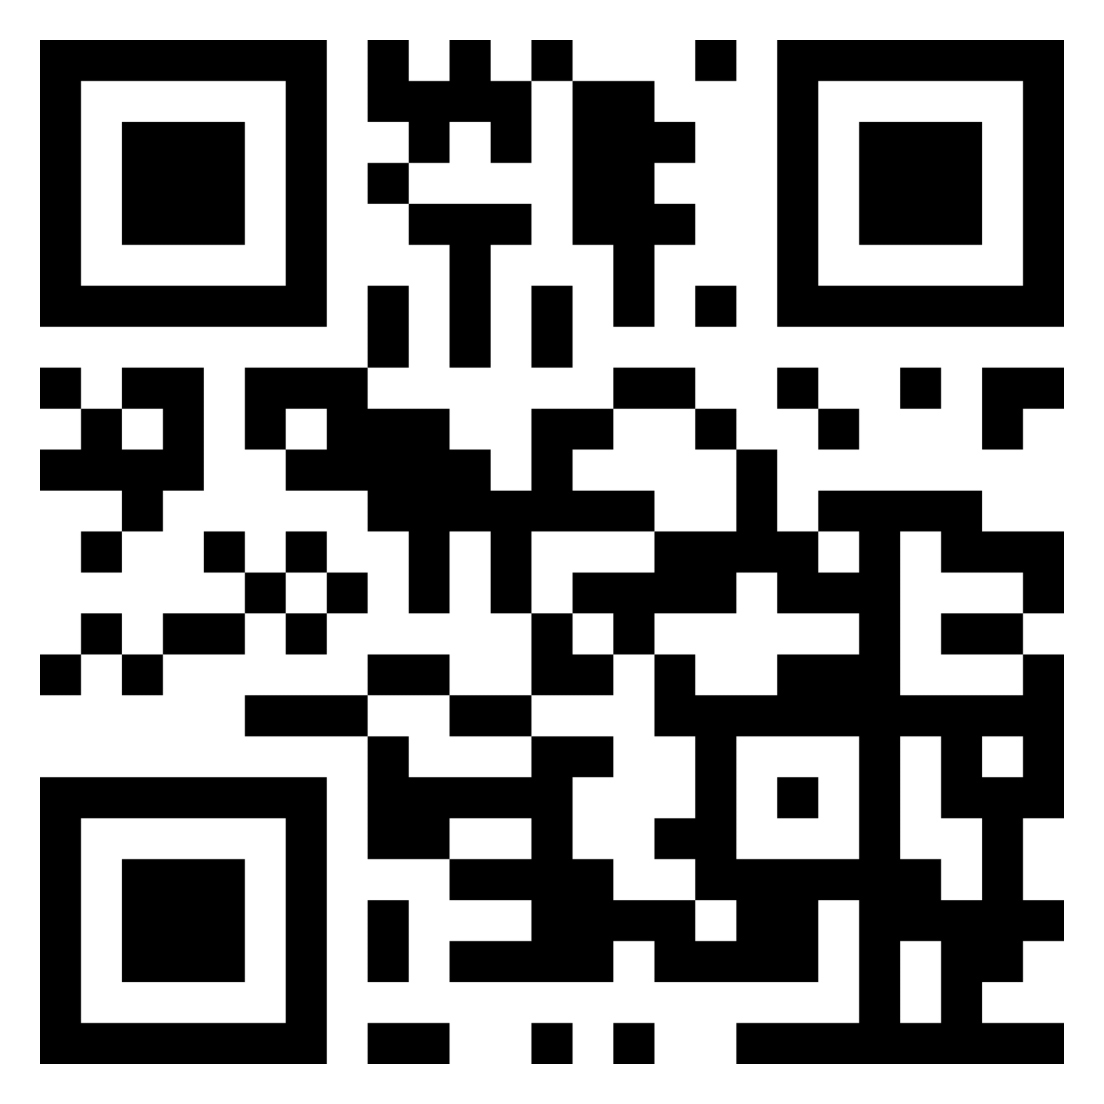
If it resolves correctly your camera focus & lighting are sufficient.
Result Actions
Contextual buttons adapt to parsed type. After pressing, an action temporarily disables (≈1.5s) with a status label.
- Open (URL)
- Copy URL / Text / Email / Phone
- Share
- Add to Contacts (vCard)
- Connect WiFi (iOS share sheet to system flow)
- Call / Send SMS / Send Email
History & Favorites
- Tabs: All / Favorites / Today
- Search & multi-select operations
- Favorite toggle pins important entries
- JSON export for backup or transfer
Regenerate & Reuse
Tap a history item → choose Regenerate → original data re-populates the creation form for edits or new styling. Workflow saves time and preserves accuracy.
iOS Permissions
| Permission | Why Needed | When Requested |
|---|---|---|
| Camera | Live scanning | First time opening the Scanner |
| Photos (Add Only) | Export (optional) / Import image to scan | Only when user picks related feature |
| Contacts (Optional) | Save vCard to address book | Only if user taps Add to Contacts |
Privacy & Data
- No analytics or third‑party tracking.
- No QR content leaves the device; all parsing local.
- History stored in local storage (can be cleared anytime).
- Ad components (if any) compliant with App Tracking Transparency (only if ATT accepted).
Troubleshooting
Scanner won't detect
Improve lighting, avoid reflections, ensure code not too tiny, increase contrast of printed code.
WiFi connect fails
Check SSID spelling, password, correct security (WPA/WPA2). Hidden networks aren't encoded reliably.
Blurry preview
Move device closer then slowly back out; tap to focus; clean camera lens.
Export file large
Choose 1024px instead of 2048px or use SVG for sharpness with minimal size.
Accidental action
Use Undo (when available) or re-open from History; no irreversible uploads occur.
FAQ
Does the app work offline?
Yes. All generation & decoding logic runs on device; network only used for external actions (opening links).
Can I import an existing QR?
Yes. Use the image import option in the scanner screen to decode a saved picture.
How do I reset onboarding?
Settings → Help & Tutorial → Reset / Reopen.
Can I change language manually?
Language follows iOS system. This page offers manual toggle for reference only.
Support & Feedback
Feature ideas or issues: Support Portal